Installing expanding adaptors.
A step-by-step guide to installing expanding adaptors to castors for trolleys.
Expanding adaptors are rated to a dynamic load rating of 300 kg per castor in applications up to 1.1 m/s (4 km/h) as per standard AS1961.7-2004, ISO 22883:2004, subject to:
-
Wheel diameter being no more than 150 mm.
-
Tube thickness (of bed leg) being greater than or equal to 1.4 mm.
-
Expanding adaptors being used with Fallshaw’s pintle bolts—M12x80 (mild steel) or M12x65SS (stainless steel)—which have very specific geometry mechanical properties.
-
Being installed as per the fitting instructions below:
Torque of 25-30N/m resulting in bellowing (expansion) of between 1.0–1.5 mm.

Nylon expander
-
Round or square.
-
Available in 19, 22 and 28 mm.
-
Available in white, grey or black.

Rubber expander
-
Round or square.
-
Availble in 19, 22 and 28 mm.
Instructions
Step 1
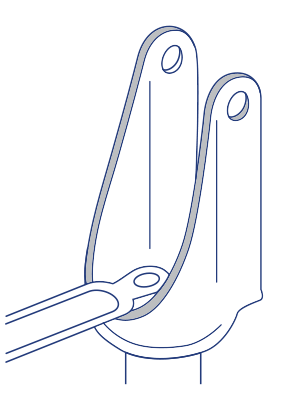
Remove the wheel from the fork.

Step 2
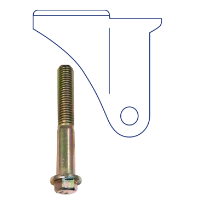
Insert the bolt up through the castor bolt hole. A bolt with 13 mm across flats (A/F) hex is provided with castors.

Step 3
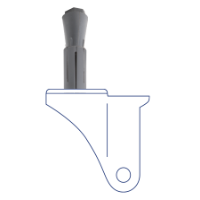
Insert the cone into the tapered end of the sleeve, making sure fins on the cone lock into the downward opening slots.

Step 4
Place the cone/sleeve on the bolt and screw down until the base of the sleeve just touches the centre bolt hole rivet on the castor.

Step 5
You can replace the wheel now, or after the castor is attached to the trolley.

Note: Due to the greater offset, expanding adaptors are not recommended for use on 175 or 200 mm castors. If you do use expanding adaptors on these larger sizes be sure to fit a bolt 18 mm A/F hex (and branded M8.8).
Step 6
If a weld bead is present inside the tube, align one of the slots in the adaptor sleeve with the bead. Try the fit of the cone/sleeve with the bead, it should be a neat sliding fit. If not screw the cone/sleeve down a little and try again. Repeat this process until it is a neat fit. (Note: Sleeve pictured.)

Step 7
Insert the adaptor fully onto the tube, and then line up the notches of the expanding fitting with the slots on the castor rivet.
Step 8
Put slight sideways pressure on the castor to help the fittings grip, then tighten the pintle up firmly to ‘three finger tightness’ ie the amount of torque you can get onto a standard spanner using your three middle fingers (25-30N/m). On round tubing some bellowing between 0.5 to 1.0 mm will occur, while on square tubing the bellowing is 1.0 to 1.5 mm, and can be used as an indication as to whether you have achieved the correct amount of torque.

Warning: Over tightening could split the tube (dangerous), and distort the fittings making them difficult to reuse. However, if you under tighten the fittings they will not grip the tube sufficiently and the castor may drop out (also dangerous). Use the right amount of torque, ‘three finger’ tightness, and use the sign of bellowing as a guide.
If you haven’t already done so, you can now assemble the wheel to the castor.

Maintenance
-
You should retighten the adaptors after three months of use, then every 12 months after that. Remember the ‘three finger’ rule, ie. the amount of torque you can get onto a standard spanner using your three middle fingers (25-30N/m).
-
To remove the castor, loosen the bolt, and then tap the head. This will drive the cone up out of the sleeve, and then the castor can be easily removed from the tube.
-
A small amount of crushing of the cone is normal and proper (it prevents the bolt unscrewing unintentionally). The cone can be reused if not damaged. If damaged by excessive tightening the cone should be replaced. If the sleeve has been damaged, it also must be replaced.
Warped trolleys
You can compensate for a warped trolley by adding up to 8 mm in washers, or by using a similar piece of tubing to that of the trolley.

Order codes
| Shape | Adaptor colour | Size (mm) | Tube size ID range (mm) | Nylon adaptor code | Rubber adaptor code |
|---|---|---|---|---|---|
| Round | White | 19 | 18.5 to 21.0 | SP-ADAPER19 | |
| Square | White | 19 | 18.5 to 21.0 | SP-ADAPES19 | |
| Round | Grey | 22 | 21.5 to 24.0 | SP-ADAPER22 | -ER22R |
| Square | Grey | 22 | 21.5 to 24.0 | SP-ADAPES22 | -ES22R |
| Round | Black | 28 | 25.0 to 30.0 | SP-ADAPER28 | |
| Square | Black | 28 | 25.0 to 30.0 | SP-ADAPES28 |
